If you are installing PassagePoint for the first time, for a smooth installation follow these five steps:
- Prepare for installation check system requirements.
- Install PassagePoint Server and Client workstations.
- Install peripherals.
- Configure PassagePoint Global to manage your visitor management.
- Learn the basics of working within PassagePoint Global.
"Step 6" is a list of additional resources to help you install and configure PassagePoint Global.
Step 1: Prepare for installation and check system meets requirements
Topics covered in this section:
- Who you'll need before starting
- Back up your previous visitor management system
- Choose an option for setting up your network
- Check system requirements
Introduction
PassagePoint Global is robust software with many installation variables. To make sure your PassagePoint Global installation goes smoothly, you’ll need knowledge of the following:
-Networking - TCPIP
-Permissions - Everyone with Add\Edit\Delete rights for the following folders:
- PPGlobal
- Program Data\CSSN
- Program Data\Dymo
- Program Data\Logitech
PassagePoint Components
Java and Apache Tomcat - Both are encapsulated and installed by the PassagePoint installer.
PostgreSQL - Included with the PassagePoint installer as an optional installation component
Microsoft SQL Server or Oracle - NOT included, but certified to be used with PassagePoint
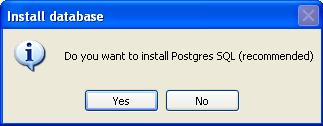
***NOTE*** during the installation process, if MS SQL Server or Oracle will be used instead of PostgreSQL, be sure to click on "No" when asked to install PostresSQL"
Who you'll need before starting
To ensure a successful installation, you should have the following people ready to assist with the installation and set-up:
- Systems/Network Administrator who understands networking and file-sharing and has permissions to properly install and configure your PassagePoint Global software. They must have Local Admin rights on the server.
- Desktop Support with Local Admin rights to the client computers.
- Receptionist/Security Officer and/or Office Manager who understands the company’s visitor management process and needs, and knows which users should access the Visitor Management System.
Back up your previous visitor management system (if applicable)
Be sure to back up your past visitor records from your previous visitor management system before installing PassagePoint Global. You should also keep any software and hardware from your previous visitor management system
Choose the installation type for your Visitor Management System
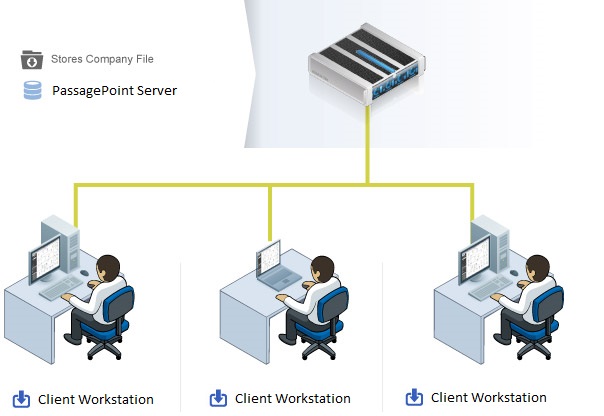
Your network can be set up one of two ways. The following diagrams illustrate workstations and servers with different installation scenarios. Choose the option that works best for your company.
Standalone
All PassagePoint Global files and server components are installed on one workstation. The downside of this setup is that the database will not be backed and protected against a hard disk failure if the workstation is not on a backup server/schedule. This installation is best for small installations; one copy of the software or for demo/test purposes.

Client - Server (networked)
The PassagePoint Global sever components and database are installed on a server. The workstation components are installed on each workstation; these workstations access the server over the network.
Operating System requirements
Before installing PassagePoint, please make sure that the Windows Operating System meets the following requirements:
PassagePoint Server
PassagePoint Server should be a 64 bit system with any of the following Operating Systems:
- Windows Server 2022
- Windows Server 2019
- Windows Server 2016
PassagePoint Client
- Windows 11 (64 bit)
- Windows 10 (64 bit)
During install of Standalone or Server, Local admin rights are required for installing PostgreSQL.
Database Support
PostgreSQL is the default Database and is part of the PassagePoint installation package.
***NOTE*** SQL or Oracle can be used instead of PostgreSQL
- PostgreSQL 9.2, 9.6, 16
- Microsoft SQL Server 2014, 2016, 2017 and 2022
- Oracle 11g and 12c
RAM, storage and application requirements
- Recommended Specs for PassagePoint Server
- Processor Intel Core i7 or better
- RAM 8 GB or more
- Hard Disk 100 GB (other than the OS and other standard software)
- Recommended Specs for PassagePoint Client
- Processor Intel Core i3 or better
- RAM 6 GB or more
- Hard Disk 50 GB (other than the OS and other standard software)
- USB 2.0 or 3.0 Serial Ports to connect with devices like scanners, webcams, etc.
* Additional RAM and a powered hub may be required when using multiple USB devices, such as license scanner, printer, barcode scanner, camera, biometric scanner, etc. USB 2 ports offer best performance.
**Hard disk space is based on moderate data growth. Please contact your PassagePoint representative for larger deployment requirements.
Web Server
Apache Tomcat
**NOTE** IIS is required when web SSO or AD is needed. Please see below.
Microsoft IIS
- PassagePoint supports integration with Microsoft IIS (Internet Information Services) such that the PassagePoint Web module has Single Sign On support with IIS using Active Directory.
Port Requirements
Ports Required for Client to Server Communication(open from client to server):
○ 2080 -> Default Web port, to run PassagePoint web on http
○ 9876 -> PassagePoint server port
○ 9875 -> This is a PassagePoint client node port which basically is used to
Other PassagePoint Ports:
○ 9080 -> Default HL7 port (if configured)
○ 2081 -> Rest API connector port (if configured)
○ 8006 -> Default Tomcat shutdown port
○ 8009 -> Default AJP port for Tomcat
Other Generic Ports (as needed per feature used):
○ 80-> Default Web port
○ 443 -> Default Web SSL port
○ 25 -> Default SMTP mail port
○ 389-> Default LDAP port
Remote Internet Access
PassagePoint does not require outside internet access unless customer plans to use one of the advanced Watchlist features. The following require remote internet access:
- Sex Offender Search
- Visual Compliance Restricted & Denied Parties List
- MK Data Denied Party Screening
- Importing Government Watch Lists
Proceed to the Next Step
You’ve finished preparing for your installation; now it’s time to move on to Step 2: Install PassagePoint Global server and workstations. Back to Top
Step 2: Install PassagePoint Global server and workstations.
Installing PassagePoint
Whether this is a standalone or network installation the treatment is the same.
Server Installation
The person installing PassagePoint must have Administrator rights to the server. Begin by loading the product into the Server CD drive.
Server Information
Note: Before beginning with the Server installation write down the Server name and the IP Address. You will need this information for the Client work station installation. If your company uses DNS then you can use the Server name for the client. If your company does not use DNS then you will need to assign the server a Static IP Address.
Open the Global folder on the CD drive. Double click on the “Setup_Global.exe” file. The installer is programmed to ask several questions during the installation process.
Language Options
Note: While PassagePoint has been designed for multi-lingual use, for installation purposes this process shall be treated using English. The same steps shall apply when installing using one of the below depicted languages.
|
This is the first installation screen. Pick language and then click on the Next button 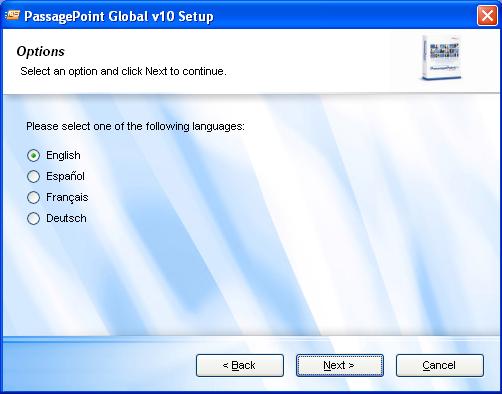 Opening instructions screen, read and click on the Next button 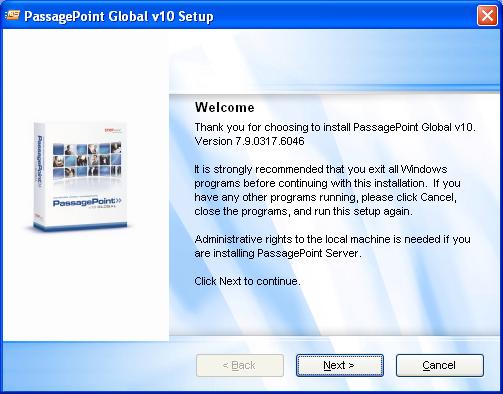 License Agreement Standard End User License Agreement. Please read and if you agree to the Stopware Terms then click on the I Agree Radio button. Once you click on this button the next button will light up and you will be able to continue with the installation. 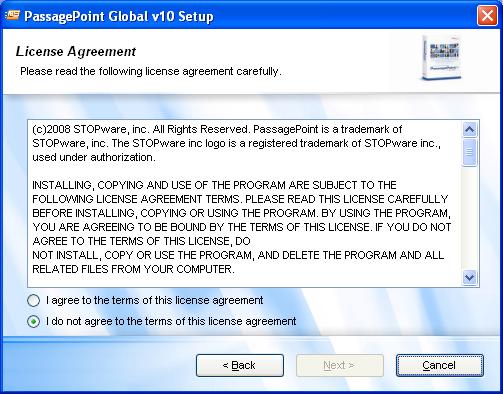 Installation Type When doing a Server installation, STOPware recommends that you install the product as a Standalone on the server. This gives you the benefit of using the GUI interface to the product so as to add product licenses and customize the product for the end user. Note: When doing a client work station installation you would only click the Client radio button. 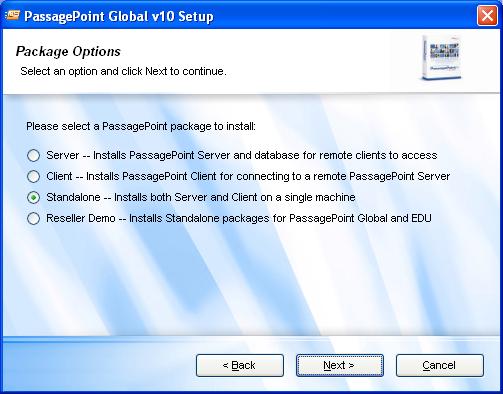 |
Locating an Installation Place for your Software
The PassagePoint installation routine defaults to the root of the “C” drive to install the product. True Server installations should be installed on the Server Application drive. Typically this would be the “D” drive but this is customer driven and company policy should be adhered to when installing the server side of the product.
Note: If you do change the location of the PPGlobal product the PostgreSQL product should be installed in the same general location
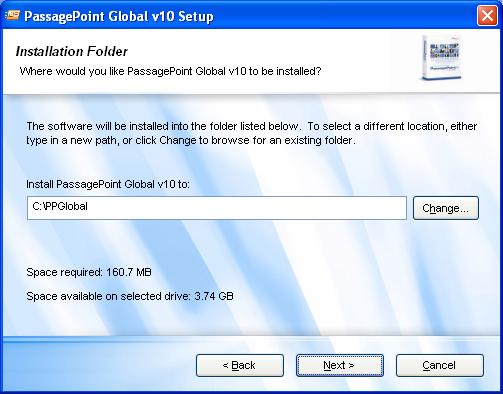
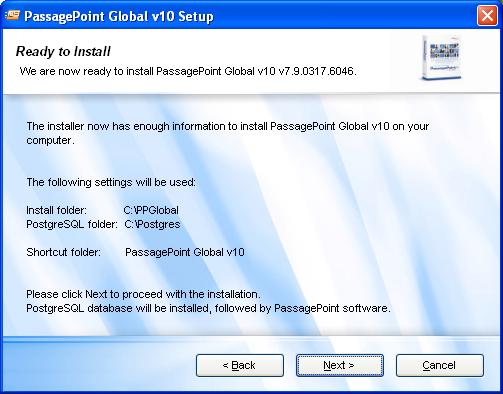
Please check to make certain that the new installation locations are correct if you intended to change the locations. Once confirmed please click the next button.
Postgres SQL is a required sub-component of the PassagePoint Global product so the answer would be Yes.
The product will now install the PassagePoint Global and PostgresSQL programs. 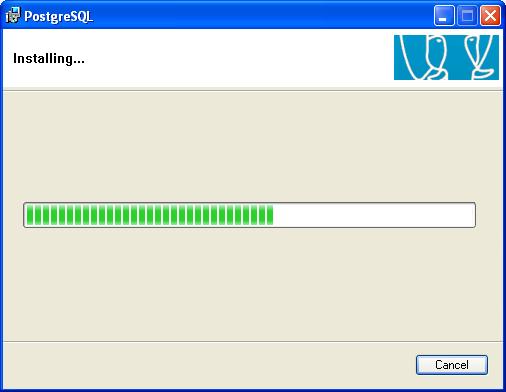 The installation bar may disappear during this process. The installer is setting up the services on the computer. There is no need to be concerned if this happens. 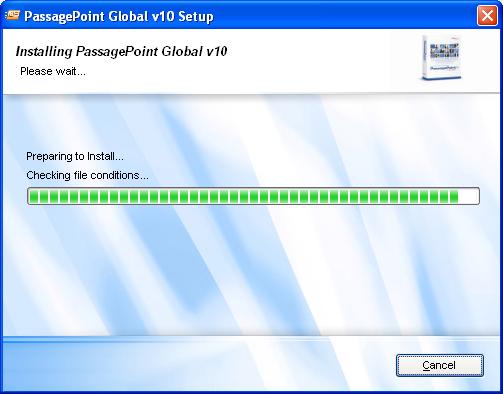 The product is formally installed when the finish box appears. Click the Finish button. 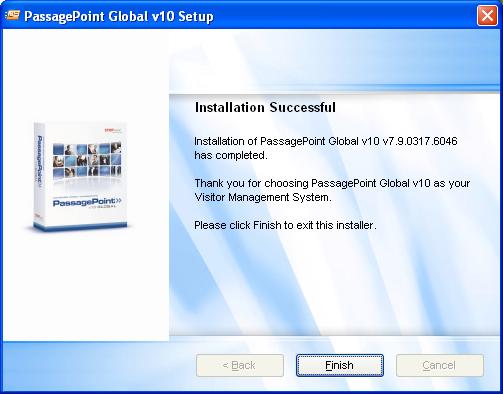 |
Licensing PassagePoint
A new Icon will appear on your desktop. This is the new PassagePoint program. DoubleClick the icon to start the program.This is the PassagePoint Log in Screen. Click your mouse in the Login Name box. The user name is: admin.
Leave the password box blank and then click on the Login Button
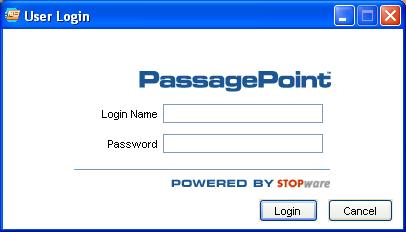
You will now start the licensing process. Information about your company goes here. Pink areas on the data entry fields are required data fields.
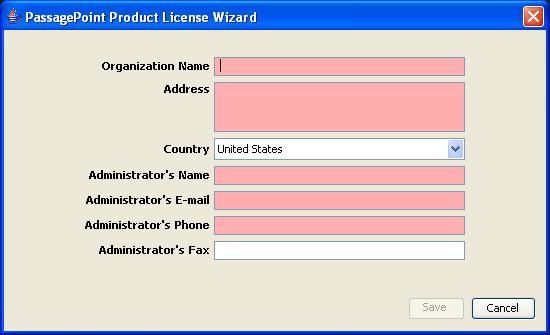
Licensing your product
Auto License Feature
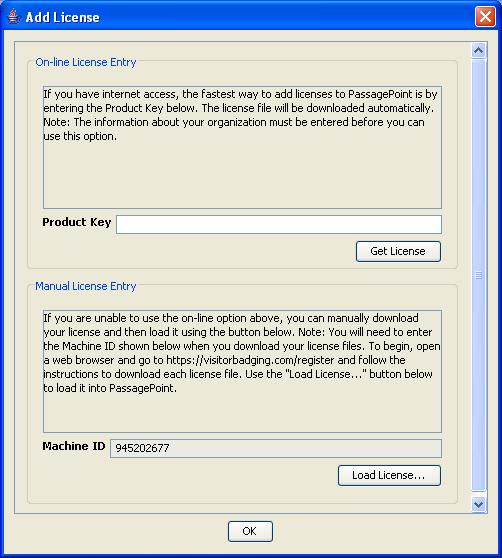
STOPware encloses license keys in the CD case. Depending on what was purchased by your company will determine what product keys will be supplied.
Once the license key number is placed in the Product Key field area, press the Get License button. If the download was successful then a Blue Bar will appear with a comment insidethat states download was successful.
Repeat process for all licenses purchased.
Hint: You will be placing the product key in the Product key box. Before you press the Get License Button, Open your Web Browser. In some cases this makes it easier for the PassagePoint program to get out and touch the Stopware Licensing Server
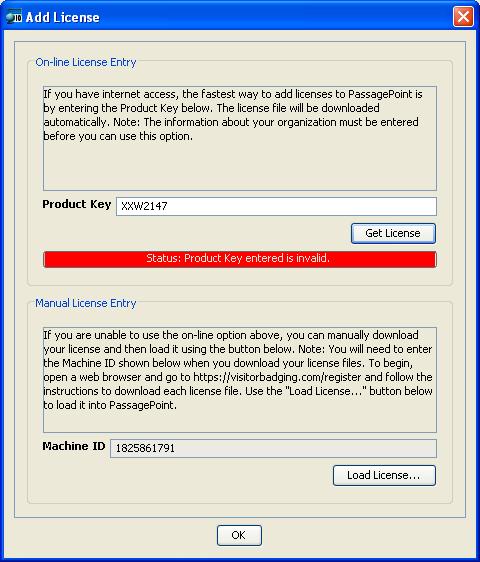
If the license download was unsuccessful then a Red bar will appear stating Download was unsuccessful.
Note: In some cases PassagePoint cannot get out of your companies firewall. If this happens then you will need to manually download the license key from the STOPware Licensing Server.
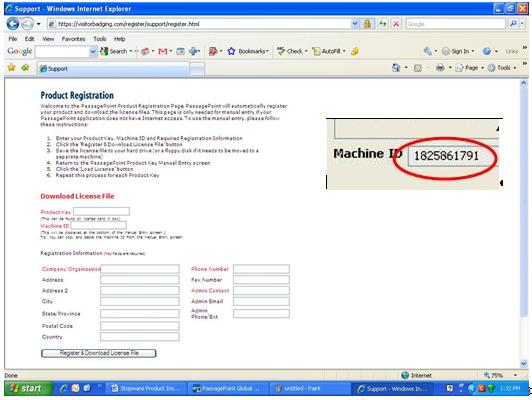
Manually Licensing PassagePoint
Note: Leave the Licensing page open in PassagePoint. Copy down the Machine ID number.Connecting to the STOPware Licensing server is easy. Open your Web Browser and go to the following web site: http://visitorbadging.com/register
You will need to fill in the Red box fields which required. Remember the Machine ID number that you copied down will need to go into the Machine ID box.
HINT: Once the required fields are filled in you will click on the Register and Download License file button. The license file will have an SWR extension on it. Please download this file to the root of the PPGlobal folder on your server. DO NOT CLOSE OUT THE WEB BROWSER IF YOU HAVE MORE THAN ONE (1) LICENSE TO REGISTER. You only have to change the license number, this will save you time.
Server Installation is Complete
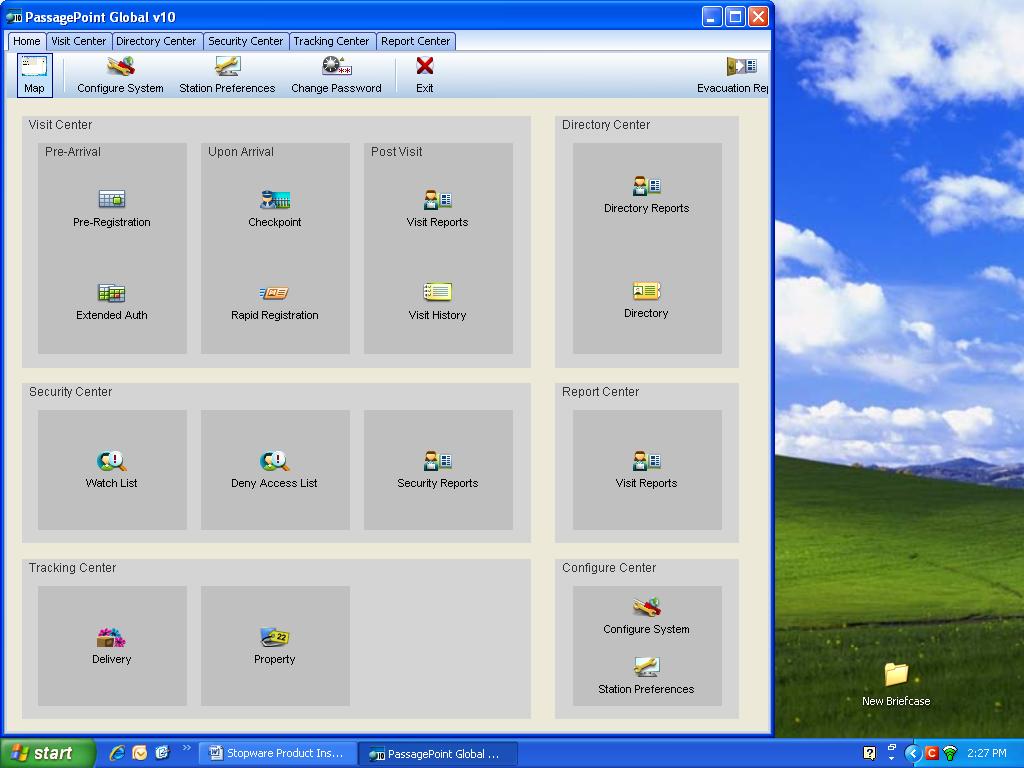
This is the map screen. Congratulations you have successfully setup the PassagePoint server.
Client Workstation Installation
The steps to installing a client workstation are the same as installing the server but with one exception.
Installation Type
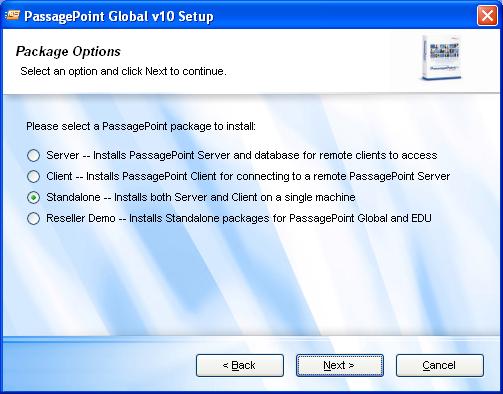
When you get to the Package Options section you will click on the Client Radio Button.
Note: When doing a client work station installation you would only click the Client radio button.
Starting the Client Workstation
Once the client software is installed there will be a PassagePoint icon on your desktop.
Pointing the Client Workstation
Before the log in page appears the network location box pops up. This is where you will type in the name of the server or the static IP address depending on your company’s IT procedure.
Installing PassagePoint Global using the MS-SQL product
If your organization wishes to use an MS-SQL database the following instructions will point you in that direction.
http://downloads.stopware.com/docs/global/setting_up_w_MSSQL.zip
Installing PassagePoint Global using the Oracle product
Contact Support@STOPware.com for more information on the Oracle database.
Proceed to the Next Step -
You’ve finished installing the PassagePoint Global software; now it’s time to move on to Step 3: Install Peripherals.
Back to Top
Step 3: Install Peripherals
HARDWARE SUPPORT
Below is a short description of the hardware devices that may be used with PassagePoint. Many of the supported devices require USB 2.0 ports. Install the devices according to the manufacturer’s instructions. A description on how to configure these devices within PassagePoint is covered in Step 4 – How to Configure PassagePoint Global.
Badge Printer
Practically any printer with a Windows driver can be used by PassagePoint. In most cases, small, direct - thermal style printers are best since they require little desk space, do not require ink and quickly print one badge at a time. The printer commonly used with PassagePoint is Dymo’sLabelWriter400Turbo (www.dymo.com).
Printer Setup for PassagePoint Global
Business Card, ID/License & Passport Scanners
The Card Scanning Solutions (CSSN) hardware works with PassagePoint to scan business cards, driver’s licenses, ID cards and passports. The data and photo captured from a scan is automatically entered into the current visit record. Currently, PassagePoint works with the ScanShell 800, 800N, 1000, MagShell 900, and SnapShell models. USB 2.0 ports are required for these devices to be accessible. Please refer to the CSSN documentation for questions about specific requirements.
Photo Capture Device
PassagePoint can capture photos using a TWAIN or WIA driver for an USB 2.0 camera. Various cameras will work with PassagePoint, including Logitech QuickCam line of cameras.
Barcode Scanners
Barcodes printed on badges or sent via Email may be used to sign in/out people. When a barcode is scanned, PassagePoint can either open a tab containing that person’s visit or automatically sign in/out that person.
PassagePoint Global supports three Bar Code Scanning devices for use in a few different ways. One way to use bar codes is the guest notification lookup. When a visitor is pre-registered via the Web Pre-Registration module by an employee, the visitor is sent an e-mail invitation from PassagePoint with the date and time of the meeting and a bar code for the visit. Tthe visitor is asked to bring the e-mail with them. Upon arriving at the site the reception person scans the bar code and pulls up the visitors pending visit record. The reception person then completes the visit process.
Another way to use a bar code in PassagePoint, is that a Bar Code can be printed on the visitor badge. When the visitor leaves the facility, the reception person scans the bar code and can rapidly sign out the visitor.
Pv10_barcode_setup.zip
The above referenced zip file contains an executable files that needs to run to program the Bar Code reader to act as a serial port reader. The Word doc sheet contains the program codes to make the scanner think it is a serial bar code reader.
Signature Capture Devices
Documents that people need to agree to can be signed electronically with a Topaz signature capture device. Signatures can be captured and displayed on the agreement window when using the SignatureGem 1x5 model. Topaz’ 4x5model has the added ability of showing the agreement on the screen of the signature pad device.
Biometric Fingerprint Scanners
When identifying a person, a fingerprint scanner can be used to access a person’s current visit record or link to their previously record person data. A new person can be enrolled into the fingerprint device database and used later for sign-out or starting a new return visit. Currently, the M2 -Hamster device from M2Sys is supported.
Proceed to the Next Step -
You’ve finished installing your Peripherals; now it’s time to move on to Step 4: Configure PassagePoint Global.
Back to Top
Step 4: Configure PassagePoint Global
This document How to Configure PassagePoint Global explains how to configure the following:
User Administration- User Accounts
- UserRoles
- User Authentication Rules
- RuleOptions
- PassagePoint Password Rules
- Changing Passwords
Communication Settings
- E-mail Server Setup
- E-mail Templates
SystemLists
- Agreements
- Using a Visitor Sign-in Station
- Reception Administration of Agreements
- Configuring Agreements
- Destination Places
- To Add / Edit a Destination
- Sorting the Destination Places List
- Lists
- To Add / Edit Lists Items
- To Sort a List
- People Categories
- Security Level
- Visit Duration Policy
- Agreement(s) to Sign
- Category Permissions
Badge Designer
- Stock Sizes
- BadgeDesigns
- Toolbar
- BadgeObjects
- Object Properties
- Print Preview
Station Preferences & Devices
- Managing Hardware Devices
- Cameras
- Business Card / ID / Passport Scanners
- Badge Printers
- Barcode Scanner Devices
- Signature Capture Devices
- Biometric Fingerprint Scanner Devices
External Systems
ImportMappings
- Data Set
- File Format
- ColumnMapping
- Running Imports
- ExternalWatch List – Sex Offender
- Configuring Sex Offender Account
- Searching the Sex Offender Database
Policy Manager
- Edit Screen Settings
- Setting Enabled Fields As Non-editable
- Setting Visibility of Fields
- Re-labeling Fields
- Applying Screen Policies
Control Center
- Enabling Control Center
- Disabling Control Center
- Allocation Editor
- Managing Locations in Location Hierarchy
- Assigning Configurations to Locations
Proceed to the Next Step -
You’ve finished configuring PassagePoint Global; now it’s time to move on to Step 5: Learn the basics of working in PassagePoint Global.
Back to Top
Step 5. Learn the basics of working within PassagePoint
Congratulations!PassagePoint Global has been installed and configured; and you're ready to process visitors.
These documents will help you to train your operators to process visitors.
http://downloads.stopware.com/docs/global/PassagePointUsersManual.zip
http://downloads.stopware.com/docs/global/PPGlobalDeskReference.zip
Additional resources:
Technical Support
STOPware has a technical support team available from 9:00 AM EST to 8:00 PM EST Monday through Friday. Our support telephone number is 408-367-0220 Extension #2.Please have your Customer Information, hardware specifications, and Software Operating information available prior to calling for support.
Manuals:
PPV10_Installation_Manual.zip
PPGlobalAdminManual.pdf
PPGlobalGettingStarted.zip
PPG User Manual.pdf
PPGlobalDeskReference.zip
Pheripherals:
ScanShell_SDK_setup.zip
PPv10_barcode_setup.zip
Printer Setup for PassagePoint Global
Technical information:
PPv10_ArchitectureWP.zip
PPv10_SSO_IIS_Tomcat.zip
PPv10_OptionsDiagram.zip
PPv10_DirectoryLink.zip
Data_migration.zip
PPv10_LDAP_With_Web.zip
LDAP_SSL_setup.zip
Setting_up_w_MSSQL.zip
GlobalW800andPostgresql.zip
PassagePoint Global Implementation Plan
Access Control
PPv10_AccessControl.zip
Ccure9000_IntegrationGlobal.zip
Back to Top

